As you may or may not know, I am all about anything pink, so I decided to customize the new WebWorks Reverb skins to add each of them to be pink! Using these instructions, I began my quest to get Hello Kitty-esque themes in my project. The first and perhaps most important step in getting your custom themes created is to create different targets in the project so that the customized CSS will have a place to live:
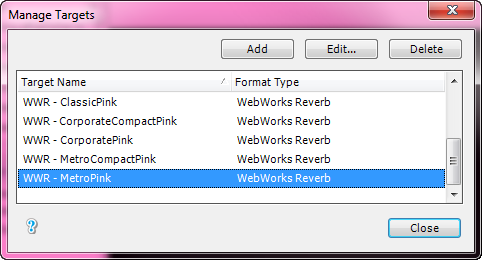
If you are not familiar with how to add Targets, refer to this documentation on the subject. Here is also a refresher on what I am referring to when we talk about targets (versus output Formats in your project). So once we have these created in ePublisher Designer( in creating customizations like this you will need to use Designer not Express). You will need to select the desired theme to customize in the Target Settings, by going to Target -> Target Settings -> WebWorks Reverb -> Skin. This will bring up a popup window that lets you select the plugin file and for the highlighted Target “WWR – MetroPink”, for example, I am chosing the WebWorks Metro Red, just because it is close to pink, but you can choose anyone you want:

Now at this point, most would start going to the CSS customizations, but for the purposes of this demonstration, we are going to continue to select the different Targets and assign different skins to them. There are 36 different color combinations, but for the purpose of the demonstration I will upload the main 4 different skins: Metro, Classic, Corporate, and Social, which doubles when you consider the compact versions of these.
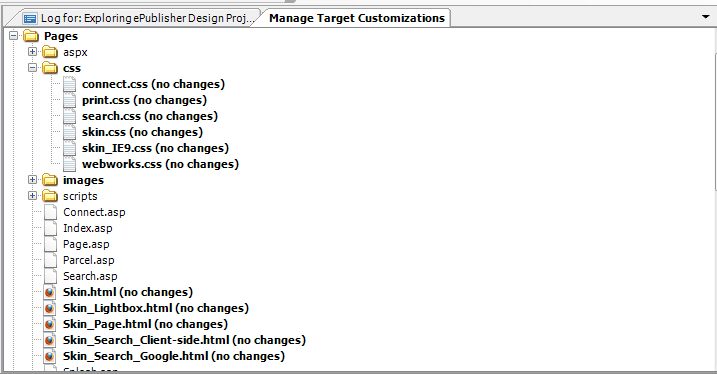
So let’s pick MetroPink WebWorks Reverb Skin’s Target and go to Advanced -> Manage Target Customizations. As a side note, you have to use this instead of Manage Format Customizations. Remember we are basing these modifications off the skins picked in the Target Settings, so it would simply not be feasible to customize the whole WebWorks Reverb format customization in your project. Clear as mud? Here is the screenshot of all the files that you will need to have customized:
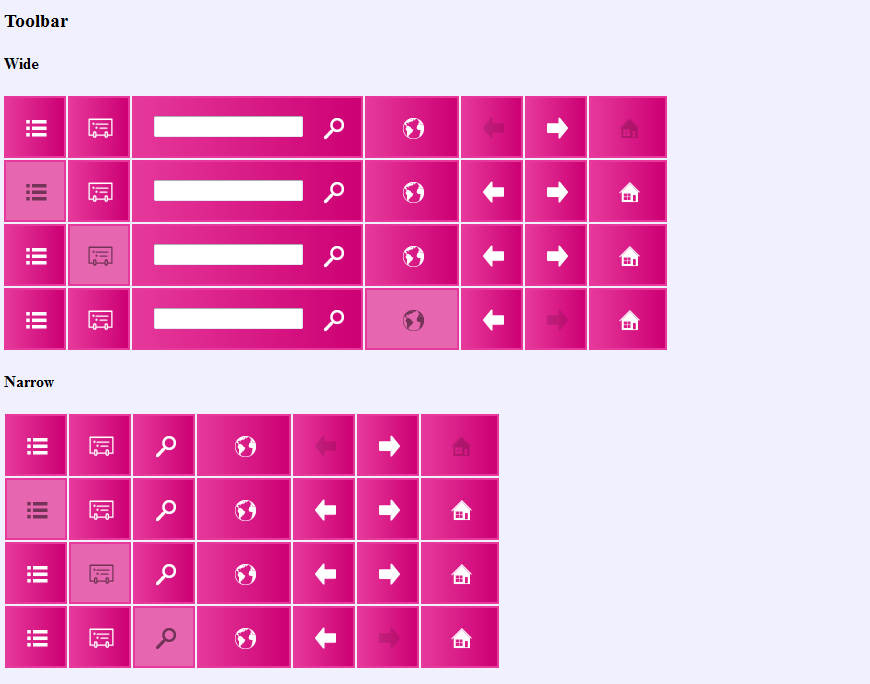
I used this page to get a pink palette, that would be easy on the eyes (no neon green and pink, please!) but awesome enough to be my own. To change the skin.css, I used “find and replace” to get the colors to be how I wanted them. So I ended up, for example, with code like this for the toolbar:
.ww_skin_toolbar_background_default {
    background: #E6399B;
    background: -moz-linear-gradient(left,  #E6399B 0%, #CD0074 100%);
    background: -webkit-gradient(linear, left top, right top, color-stop(0%,#E6399B), color-stop(100%,#CD0074));
    background: -webkit-linear-gradient(left,  #E6399B 0%,#CD0074 100%);
    background: -o-linear-gradient(left,  #E6399B 0%,#CD0074 100%);
    background: -ms-linear-gradient(left,  #E6399B 0%,#CD0074 100%);
    background: linear-gradient(to right,  #E6399B 0%,#CD0074 100%);
    filter: progid:DXImageTransform.Microsoft.gradient( startColorstr='#E6399B', endColorstr='#CD0074',GradientType=1 );
}
That css creates a gradient of lighter (#E6399B) to darker pink (#CD0074) You can experiment with this by doing a find what on “white” and replace with #E667AF, this will make the highlight and other colors turn to a light shade of pink, so it will go with palette that we are creating. To see your work in progress, you can click the Skin.html file from the interface and it will show what you have done, let’s take a peek at our skin:
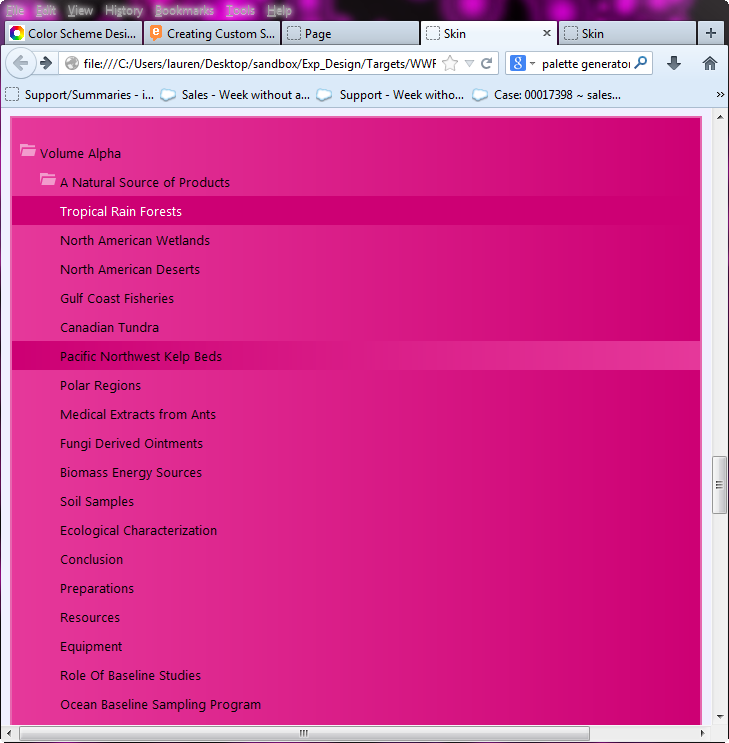
This looks cute, but look at this:

Our TOC is practically unreadable, so now what we need to do is make sure that our highlighting color and our toc entries are different, maybe a lesson not to do a find and replace, but more of a section by section just to verify what we are doing doesn’t negatively effect another section in our skin, so here is my improved toc with black links and the opposite gradient as the over (all I did was switch the colors from the toc entry and made it the hover, now.
Finally, we can modify the Related Topics and Mini-TOC in a similar manner but do note that these will be modified in webworks.css. I didn’t change the webworks.css from the red theme because I like the contrast to all that pink! For the social skins, I left the white background because of the drop-shadow on the left-hand pane, it would look weird with any other color. Of course, using CSS you can change the color to whatever you want just modify in your social skin the CSS for the box-shadow color:
.ww_skin_panel_content {
background-color: #E6399B;
border-style: solid;
border-color: #A4A4A4;
border-width: 2px;
-moz-border-radius: 10px;
-webkit-border-radius: 10px;
border-radius: 10px;
box-shadow: 1px 1px 4px 1px #A4A4A4;
margin-right: 4px;
}
Also in the social skins there are not as many gradients happening, so that makes it a lot easier to modify. I haven’t added this to the wiki yet, but stay tuned and I will add the finished products in the next week. If there are other CSS modifications you would like to see that are not in this post, let me know and I will happily answer any questions that you may have!
Thanks for the instructions. Very easy to take the corporate skin and convert the colors to our company “blue”
I opened skin.png in illustrator in the hope I could edit the colors of the icons, but they could not be edited. Can you tell me how I might go about editing skin.png icons?