- The Style Designer Tab
- The Target Settings Window
- The Advanced Tab
The Style Designer
The Style Designer is where you determine how your content will appear in the Content Display area. ePublisher will scan your source documents and bring in the Style names and information. In the Style Designer, you can lock down the information (e.g. font, size, position, background, etc..) and change behavior such as page breaks and search relevance. You can gain access to the Style Designer by navigating to the View tab and then selecting Style Designer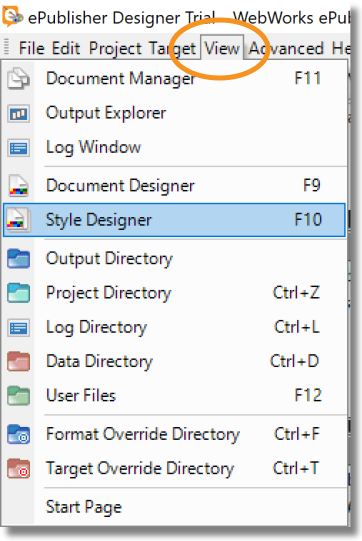
In the Style Designer there are 4 tabs:
- Properties
- Options
- Target Properties
- Target Options
Any area with customizations will appear in bold. To view the customizations select the bolded areas. The customizations will then appear in the Style Designer Window.
 Customizations in the Properties or Options tab will automatically be carried over to Reverb 2.0. Customizations in the Target Properties or Target Options tab only apply to the selected target and will need to be carried over manually to any new target.
Target Settings Window
Target settings customizations are different from the Style Designer and Advanced tab because these customizations are in the Target Settings window instead of the ePublisher Working Area.In the Target Settings you will customize items such as company name and logo, enter your Google ID, customize reports and activate/deactivate items in the table of contents, index, and footers.To access the Target Settings window, click on the Target Tab in the menu bar and then select Target Settings. Once selected, the Target Settings window will open. As in the Working Area of ePublisher, the Target Settings window shows you in bold all the areas with customizations.
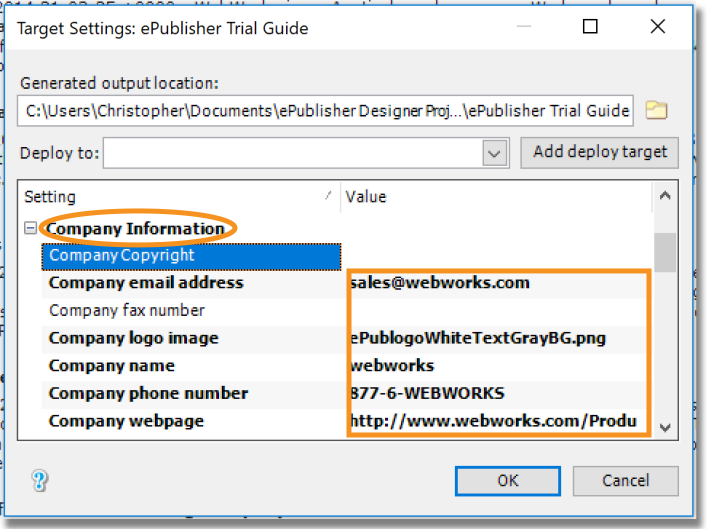
You will need to manually transfer these customizations over to Reverb 2.0. It is also important to note that some Target Settings’ categories will be different. Any category that is different will be a result of picking a different format for your target. Because of this, the difference will be a logical one, so easy to identify and understand. For example, the Target Settings category Skins in Reverb 1.0 will be different than the Skins category in Reverb 2.0. You will not have a Google category in Target Settings for a PDF format, but you will have one for Reverb 2.0 an HTML format.
Advance Tab
The customizations on this tab are edits in one of the default program files of ePublisher. The file formats include HTML templates, CSS, Java Scripting, XSL and other coding languages. Since anyone editing these files should have basic knowledge of the coding they are editing, these customizations are put under an Advanced in tab.The AdvancedTab is located on the menu bar next to the View Tab.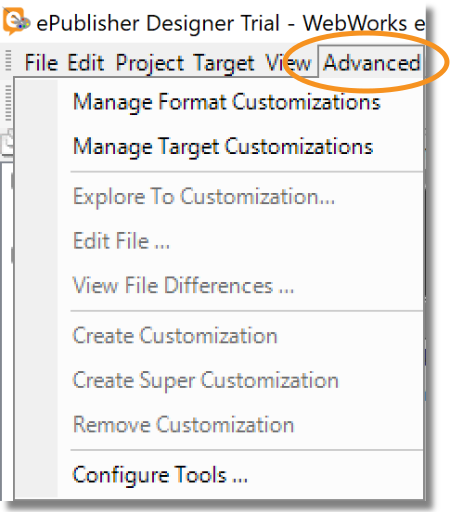
Under the Advanced Tab there are two sections:
- Manage Format Customizations
- Manage Target Customizations
Format customizations are applied to any target with that format. For example, if your target’s format is Reverb 1.0, any customization applied under the Manage Format Customizations tab will apply to all targets with the Reverb 1.0 format. Target customizations apply only to the format of the target selected.
Summary
ePublisher is a powerful tool that allows you to increase the importance of the message you deliver to your customer. Understanding customizations is important to your success and utilizing all the features of ePublisher. There are 3 areas in your Designer Project where you could have customizations. Some of these customizations will automatically carry over, others you will have to manually include, and others you will not need at all. Identifying all the areas where you have customizations and knowing how they work will help to meet the ever changing needs of your audience..google {left:100%;display:inline-block;position:fixed}
займ без проверок
https://zp-pdl.com/online-payday-loans-in-america.php