Posts Tagged ‘tutorial’

ePublisher Tips and Tricks – Reverb URL Search

Posted on: October 23rd, 2013 No Comments

I am taking a break from my Newbies series this week to present a cool feature of which you may or may not be aware. Drumroll please: using the URL bar to search Reverb. It is simple, you type in your URL, in this case, I am going to to use our own help to do this, and we are going to search for the term “othermeta” for our DITA friends:

To search this term, you can type in the following:

http://www.webworks.com/Documentation/Reverb/#search/othermeta

When you hit return, it will bring up the Google search results. (If you are using the Client-side search or IIS, it will show those results). For testing on your own help that you have generated, please keep in mind that this will need to be deployed to a web server or using IIS to work. If you do not have your http://localhost yet set up, you can actually use our “View Output” button to display a preview in your browser that will let you view the URL:

http://localhost:9292/YourTargetName/

and from there you can use the #search/yoursearch term feature as addressed above to search the help in this manner. Let me know in the comments what your experiences using this functionality have been.

ePublisher for Newbies – Setting TOC levels

Posted on: October 14th, 2013 No Comments

Part of any great help system is a Table of Contents (TOC) to help the user navigate through the topics. In this exercise we are going to use the project that we created from the last lesson, but add some navigability to the Reverb output by adding levels to our output. Let’s begin!

1.  Open up the WEP project that you previously created by using the Windows Explorer when you go to File -> Open, or by using the Recent Projects panel in the Start Page

2. Click on the first FM file again, right click and then click Display Preview

3. Click on the very first heading in the preview window and then the Style Designer will appear in the bottom as shown:Table_of_contents_level4. You will see that the level is automatically set to Auto-TOC* but for the purposes of this demonstration we are setting the Table of Contents level to 1

5. Notice again that when when change something in the Options pane, that this also makes the paragraph style bold to indicate that a change has been made

6. Repeat the steps to give Heading 1 a level of 2 and Heading 2 a level of 3

7. Save the project and click the generate all 3 gears located on the toolbar

8. Now your output should look something like this:

Toc_with_chapter_numbering

9. It looks good except that because this is a web output we don’t really need to have the chapter numbering. Never fear, ePublisher has a way to fix that as well.

10. Going back to the Options panel for each of the Paragraph Styles in the Style Designer locate the Keep paragraph numbering and the Keep paragraph numbering in TOC dropdowns

disable_chapter_numbering

11. We are going to set both of those to Disabled and we are going to repeat this for all 3 paragraph styles we modified

12. Save and generate and now the output should look like this:

no_numbering_in_TOC

As you work more with your documents, you will need to do the Display preview less as you will already know what you have set in the documents, and then you can construct your Designer projects and then base the stationery on that.  Following lessons will include different aspects of generating online help that will be useful for you in getting all that you can out of ePublisher.  Feel free to make suggestions via the comments on anything as a new user that would be helpful to learn and I will take them into consideration in creating the next tutorial. Please note that advanced customization topics such as XSL or Javascript will be best handled through the Study Hall sessions. We also have introductory topics with our Show Me sessions.

*If you are wanting more in-depth coverage of what the Auto-TOC entails, please refer to the documentation link or join one of our training sessions

ePublisher for Newbies – Starting from Scratch

Posted on: October 3rd, 2013 No Comments

Our documentation provides a lot of good information for those of you who have been working with ePublisher and want to get specific information about a topic, but admittedly it can be a bit overwhelming, so I thought I would try to distill this information for a quick-start guide in using ePublisher. By no means is this a comprehensive guide, for that we offer training.

Lesson 1 – Creating and Modifying a Designer Project

1. Go to File -> New. This will bring up the following window:

New_Project_Wizard

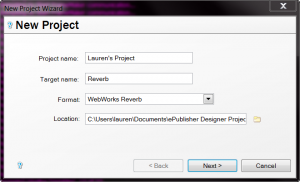
2. You can chose whatever name you want for the Project and the Target (covered more in depth by training). This window also lets you choose what kind of Format you want to use, for the purposes of this demonstration, we are going to use WebWorks Reverb (which, by the way is the output that our documentation uses). Click Next

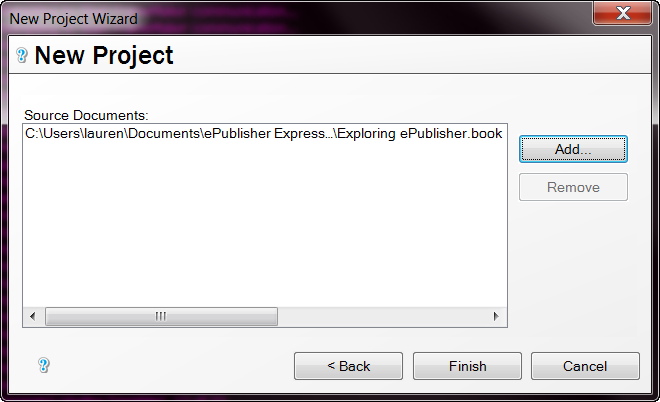
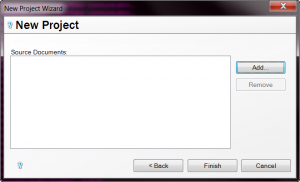
3. Click Add put source files for this document. For the purposes of this demonstration, we are going to use FrameMaker:

Add_Source_Files

3. In the next window, we are going to navigate to the following directory:


C:\Users\[yourusername]\Documents\ePublisher Express Projects\Source\Adobe Framemaker

Selecting_FrameMaker_book

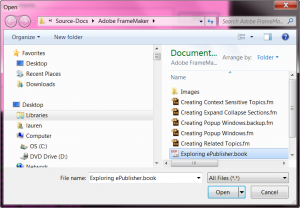
4. We are going to add the book file located in this folder. Click the Open button to add this file, and then you are going to click the Finish button on the next screen.

Added_Now_Click_Finish

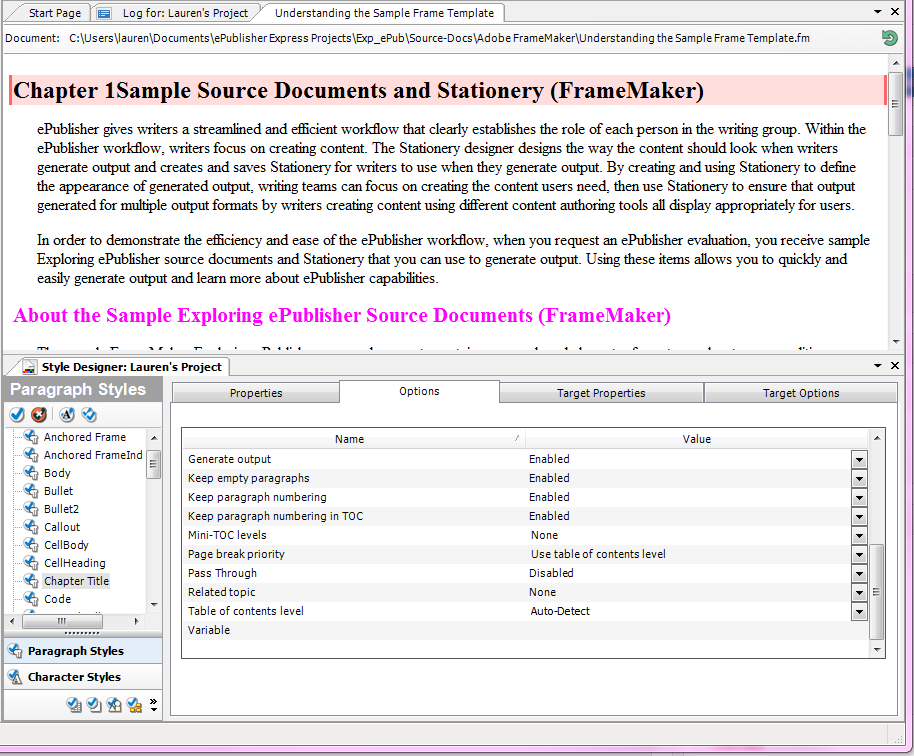
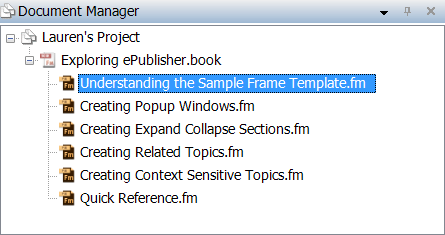
5. Now you will see something like this in the Document Manager:

Document_Manager

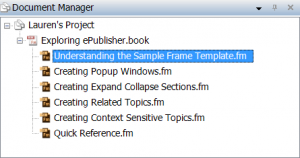
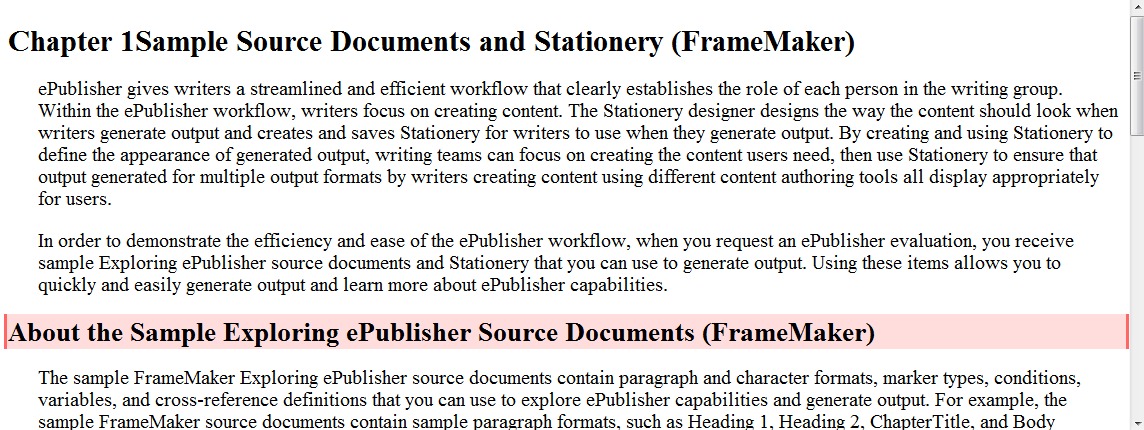
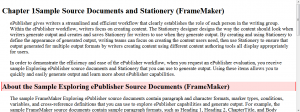
6. With the first document selected, as you see in the above image,  Go to Project -> Display Preview and you will select the “Heading_1” style by clicking “About the Sample Exploring ePublisher Source Documents (FrameMaker)” paragraph style. Again more in depth coverage of this is done in training:

Selecting_Heading_1

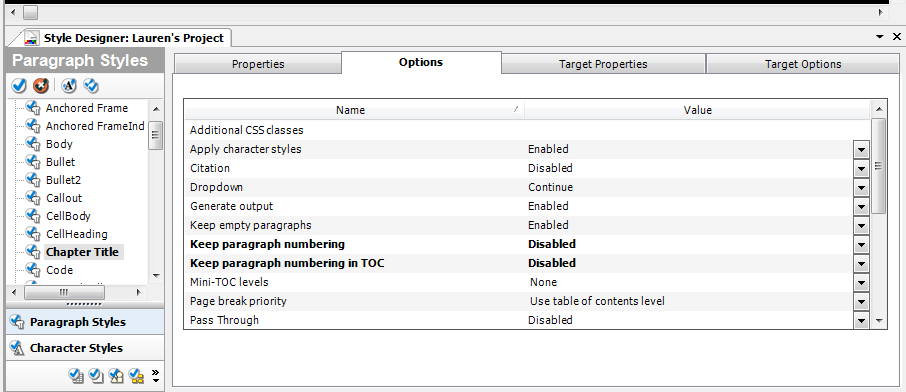
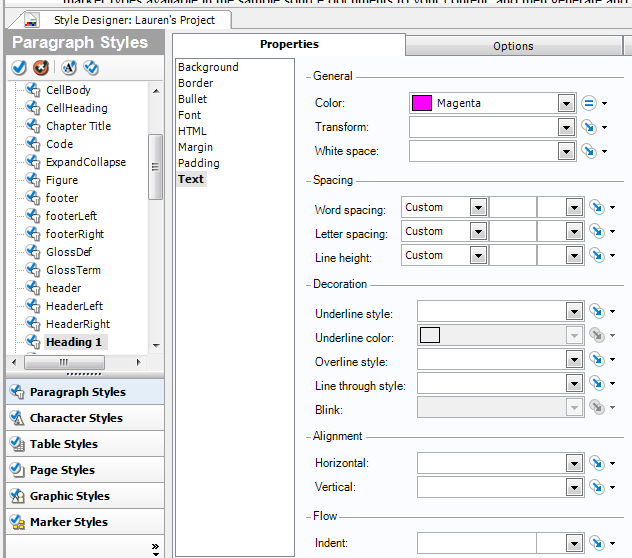
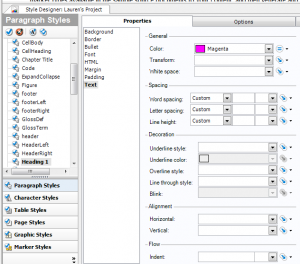
7. We are going to change the color of this heading by going to Text -> Color in the Style Designer pictured below Notice that now the Text heading is bolded, this indicates that we have made a change to something in the Style Designer:

Style_Designer

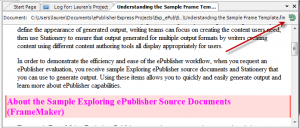
8. You can actually see the changes by clicking the green Refresh Preview button on the top corner:

Refresh Preview

9. For the purposes of this small demonstration, we are going to generate with just heading 1’s changed, Go to the 3 blue gears in the toolbar to do a generation:

Generate All

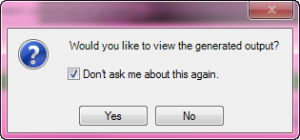
10. Once you click this, you will see logs that will indicate that you are generating and then you may get a message like this, go ahead and click Yes, and you can also select this message not to come up again as pictured below

view_generated_output

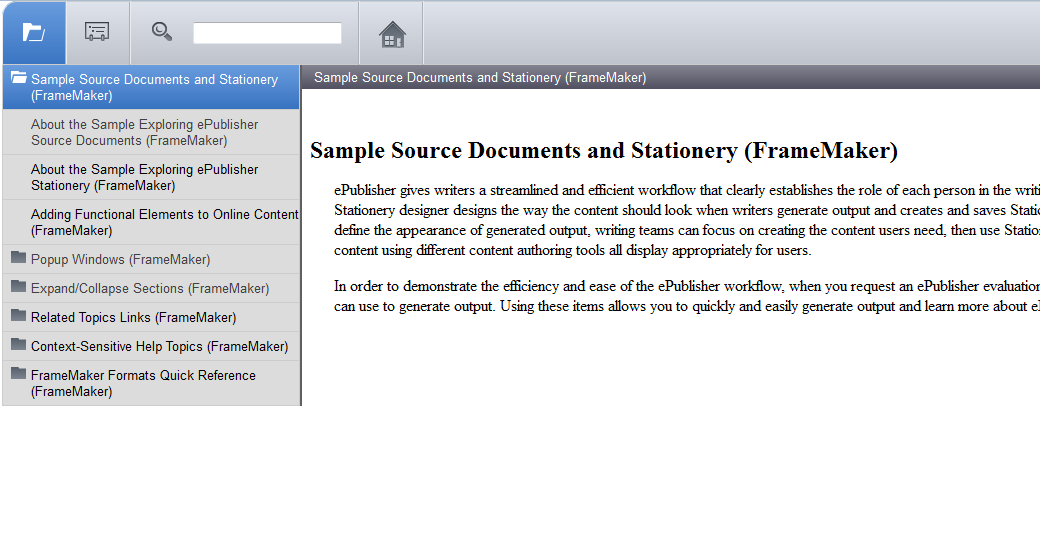
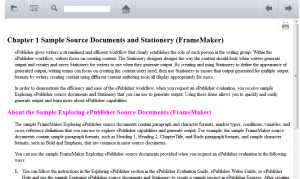
11. Once you click yes you should be able to view the output and it will look like this when you click the right navigation button on the top.

magenta_heading_reverb

12. Click File -> Save to save your project for the next lesson

So, this was a  very basic example of output that is possible from our sample source files. Right now we have navigation in our Reverb output, but we do not have a table of contents, breadcrumbs or any other bells and whistles that Reverb offers. In the following lessons, I will go over how to get cool features and settings in the output, but for now I hope this gives you a good starting point.

This blog is protected by Dave\'s Spam Karma 2: 14087 Spams eaten and counting...